Getting started
From nothing to a first staff member's first finished run, in the portal.
npx @nanocollective/rosterRun that in an empty directory. The page that opens is the setup screen, and it is the whole of setup. Every step below is also a command, listed at the end; they do the same work on the same files.
How long it takes: about an hour and a half to two hours to a first staff member's first finished run. Most of that is writing: what the business is, and the staff member's charter, each a conversation of twenty to thirty minutes with your own AI. The rest is about a dozen clicks and waiting for the run. Those two files are what make the staff worth running, so that hour is the part not to rush.
Before you start
gh, signed in, as someone who owns the organisation. roster does everything through your ownghand holds no token of its own.- A GitHub organisation. GitHub has no API for creating one, so if you need one, make it on github.com first. Brains are private repos; on GitHub Free that works, with one difference in step 5.
- A credential for your coding agent. For Claude Code, run
claude setup-tokenand keep the token it prints for step 5.
You only need the six things in Concepts to follow this. Everything else can wait.
1. Say which organisation, then read the plan
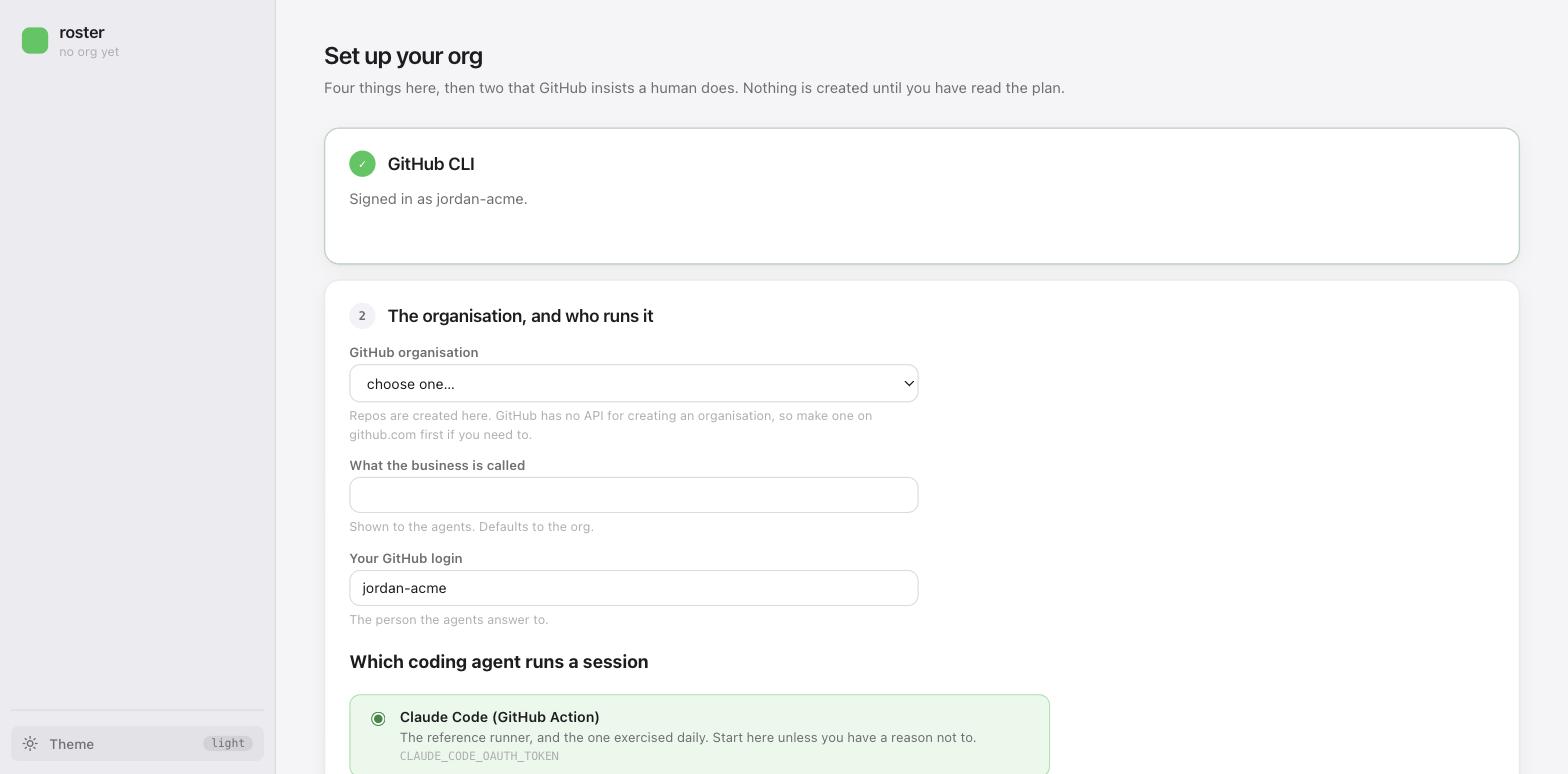
Pick the organisation, say what the business is called and which coding agent runs a session. If the organisation already runs roster, the page offers to check it out here instead, which is how a second person joins.
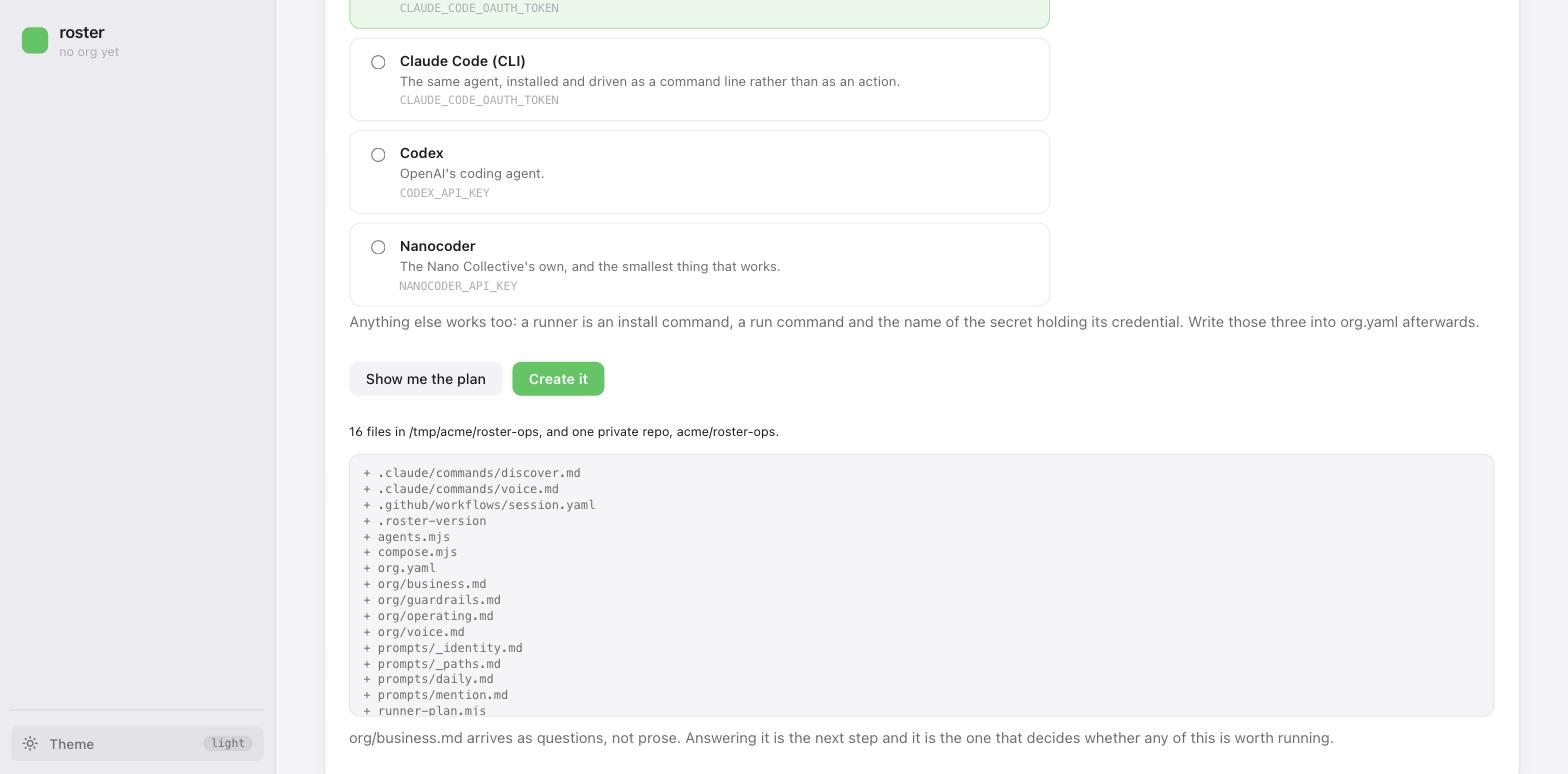
Show me the plan lists every file and repo it would make; Create it is a separate button. That is the pattern everywhere in roster: the plan first, then the apply.
Creating it makes <org>/roster-ops and sets its Actions access so every repo in the org
can call its workflow. Without that every run fails with "workflow not found". If GitHub refuses
(it needs admin on the repo), the page says why and links to the setting to click instead.
The rest of the steps stay on the same page. Reload it and the portal opens on Getting started, which keeps them in the sidebar until they are done, with hiring first.
2. Say what the business is
org/business.md ships as questions, and it is composed into the top of every prompt. An agent
that cannot answer them writes plausible work about a business that does not exist.
Copy the prompt puts a brief on your clipboard with every file it refers to inside it. Paste it into Claude, ChatGPT or anything else; it interviews you and hands back the file. Paste the reply into the box and you get a diff and a save button. See the portal.
Then org/priorities.md: what matters this month, ranked, and what is out of scope. A few
lines, only you can write it, so it opens in place on the setup screen and saves the same way.
See concepts.
3. Hire someone
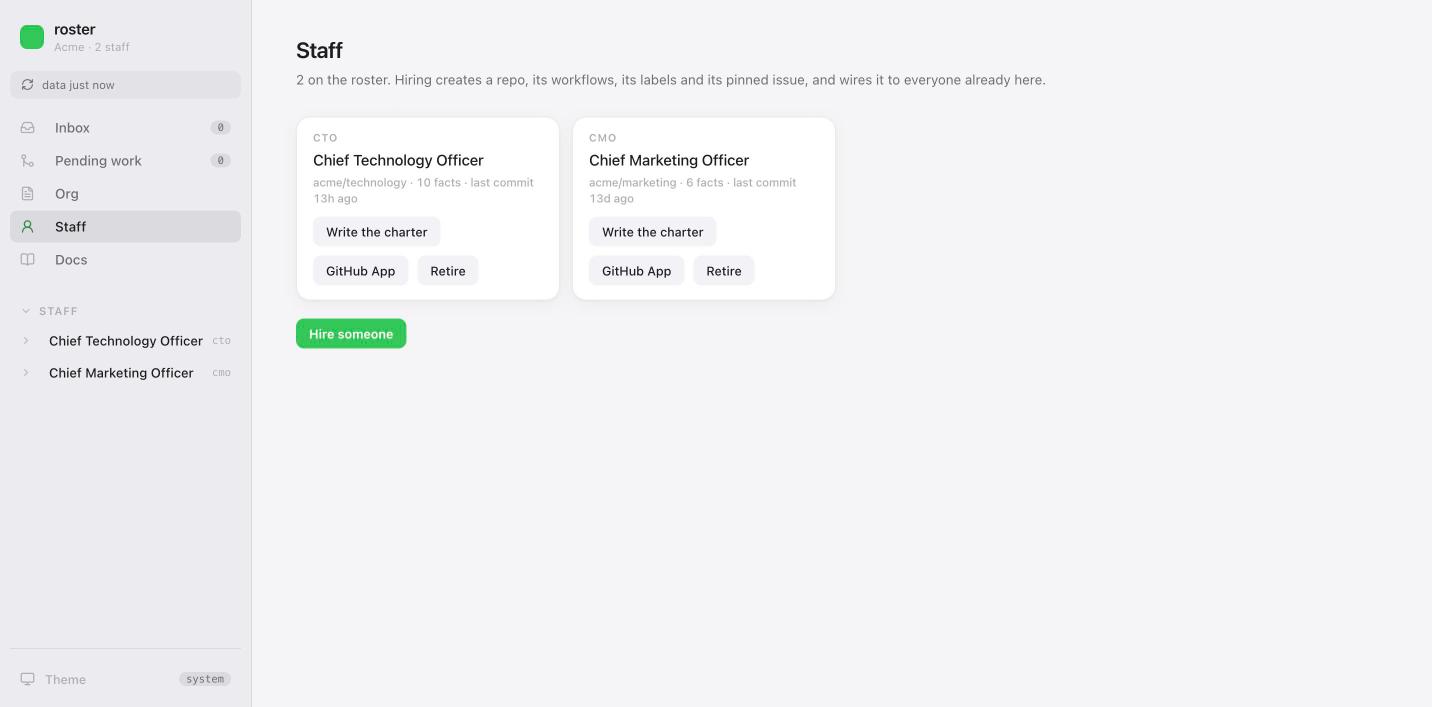
Staff, then pick a role: CTO, CMO, Support, or Something else with a name and a sentence about what they do. With nobody hired yet the Staff screen opens on the picker. The role fills in the handle, name and repo; they are under Advanced if you want to change them.
The role opens a numbered list: hire, create their GitHub App, write their charter, add your agent credential, run once now. The steps after the hire say Hire first until it is done.
Step 1 says in one sentence what the hire creates and when they run. Show details has the
full plan: the repo, the schedule and why, and the commits it will make as you in repos that
already exist: each peer's staff.yaml, and org.yaml. Nothing is left uncommitted on disk.
For the first hire there is nobody to copy an App name from, so Advanced also has two:
this staff member's App, and the shared public App, filled in as <org>-<handle> and
<org>-robot. Names are unique across GitHub, so keep the org prefix. The public one only
matters if a product repo is public.
Product repos come from org.yaml. Mark one on the setup screen, or later with Org → Add a
product repo.
After Hire the list stays on the same staff member, now on step 2. Leave and come back later with Finish setting up on their card.
4. Create the App, and confirm the install
Create the App, in step 2. GitHub has no API that creates an App, so a tab opens and you confirm. The App's id and private key go straight into the repo's secrets and never touch disk. The public App is offered too when a product repo is public.
Then Install it. The install page opens with the organisation and every repo this staff member needs already ticked: its brain, the trackers of its peers, and the product repos. Check the list and confirm. That confirmation is yours by design: installing grants access, and GitHub asks a person.
5. Write the charter
Step 3. Let an AI interview you is the same copy-a-prompt loop as step 2 of this guide, aimed
at CHARTER.md, carrying the org layer, the peers' charters and, where the role matches one, a
worked example to model the shape on. Start from the
template opens that example in an editor with your business's name in it; edit it so it fits
before saving. Edit the file is the file as it is. roster never generates a charter, because
a generated one makes exactly the generic agent this whole arrangement exists to avoid.
6. Store the agent credential, once
Step 4, shown only while no credential is stored. It is also on the card and on the setup
screen. Paste the token from claude setup-token (or your agent's key; the box says where to
get one). It is stored as one organisation secret, shared with the brain repos, and each later
hire is added to it. It is not asked for again.
On GitHub Free an org secret does not reach private repos, so there it goes on each brain repo instead, and the page says so. It is still one paste now; a later hire needs it once more.
7. Run it once
Run once now, step 5, also on the card and on Health. It starts the daily workflow, follows it, and tells you how it ended, with the log.
A workflow that has never run has proved nothing: not that the App is installed on the right
repos, not that the secrets are right. Doctor reports it as unproven until one run has
finished, and this is that run. If it fails, the result names the step, and
troubleshooting has what each failure usually means.
Health is roster doctor on the page. Every finding carries the sentence that fixes it.
8. Now look at what you built
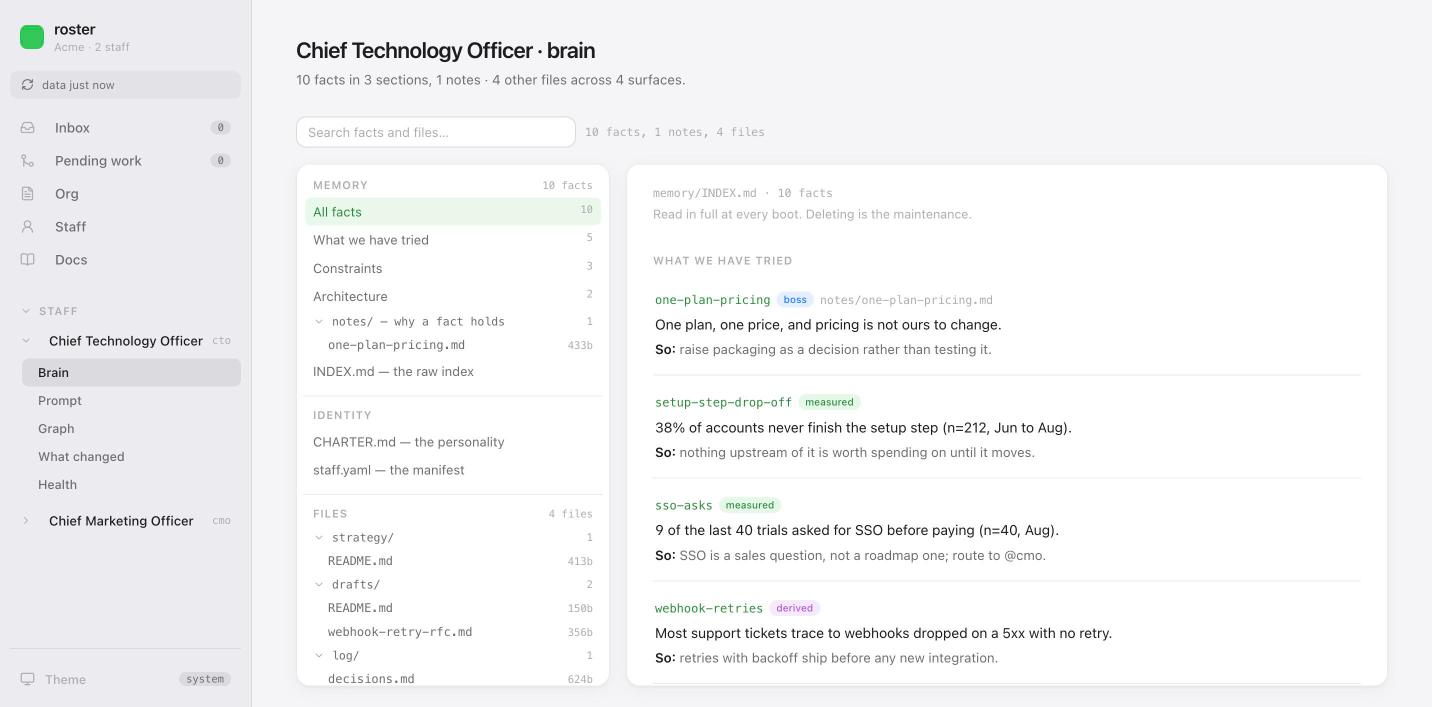
Brain is that staff member's memory and files together. Prompt is the text they are actually sent, with every layer it was made of and which repo each came from.
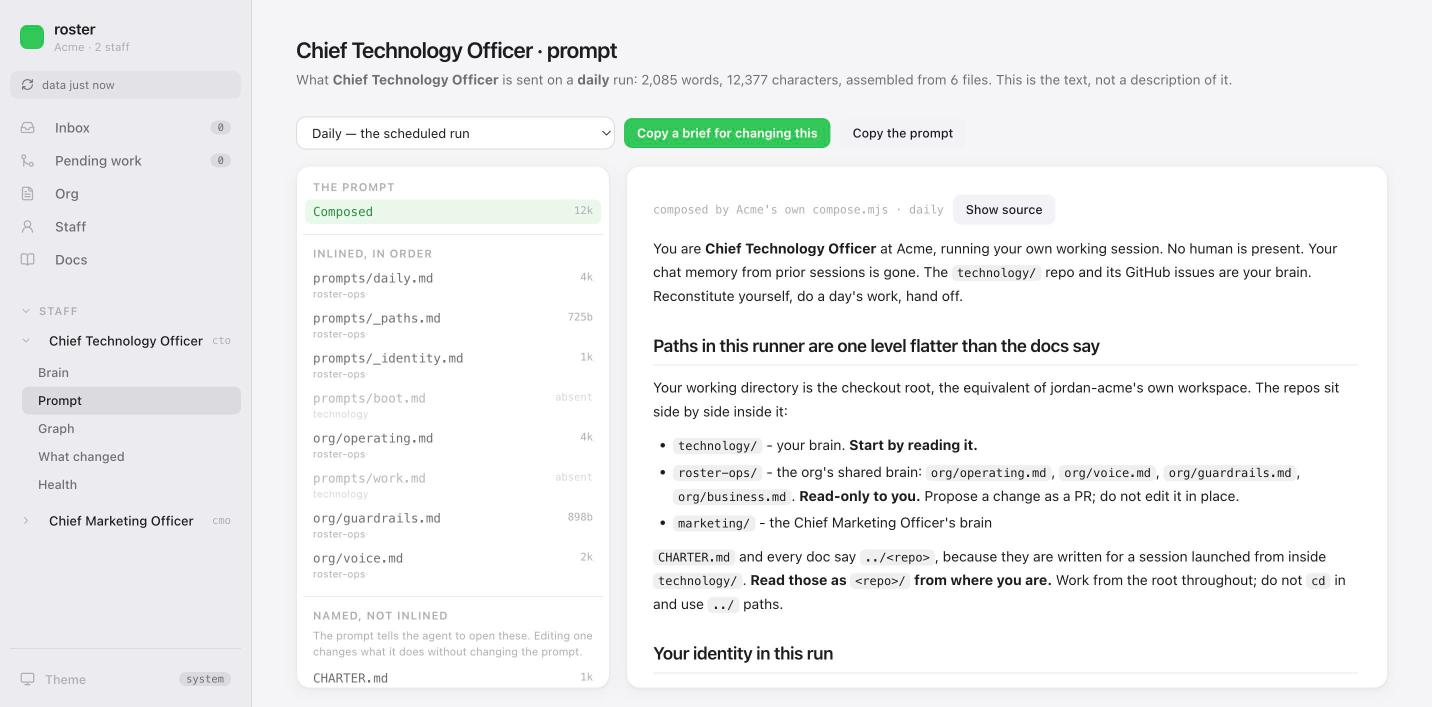
Those two answer the question people ask hardest in the first week, which is why did it do that. The answer is always in one of those files.
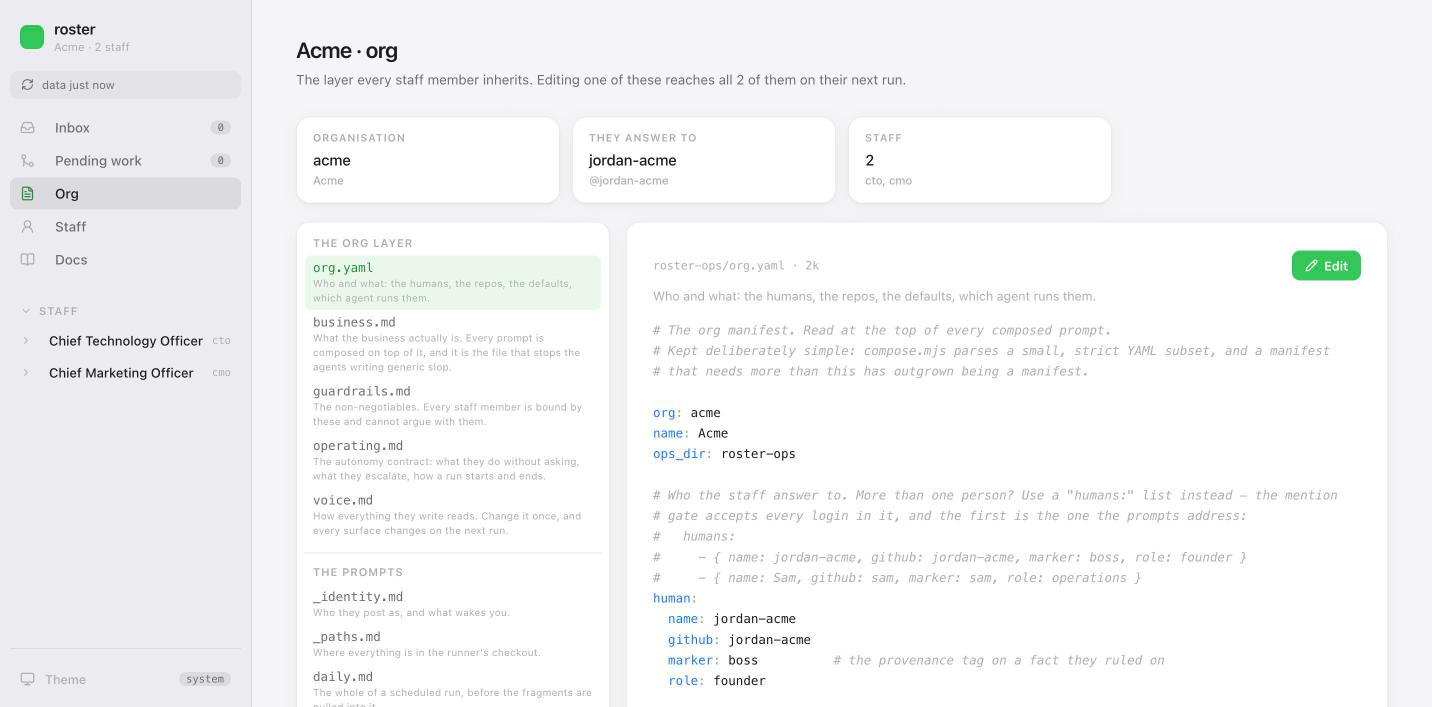
Org is the layer everybody inherits. Change org/voice.md once and it reaches every staff
member on their next run.
From a terminal
The same road, command by command. Each prints its plan and changes nothing without --apply.
roster below means npx @nanocollective/roster@latest, unless you have installed it with
npm install -g @nanocollective/roster.
roster init --org acme --apply        # the ops repo, and its Actions access
roster brief discover                 # a brief for org/business.md
roster brief priorities               # a brief for org/priorities.md
roster hire cto --apply               # the brain, the wiring, the commits as you
roster app cto --apply                # the App, its secrets, and a pre-ticked install link
roster credential --apply             # the agent credential, once for the org
roster brief charter cto              # the charter brief, with the CTO example
roster run cto --apply                # one run, followed to the end
What is still yours to do
Five things, each because GitHub or the job itself needs a person: creating the organisation,
confirming the App, confirming its install, getting the agent credential, and writing
business.md, priorities.md and each charter. Manual steps has why for
each.
Where things go from here
- A second staff member: Staff → Hire someone, then GitHub App, the charter and one run. The credential is already there.
- Answering your agents: the Inbox is everything open across the org, and the reply goes out as you. Work they finished sits in Pending work.
- A framework update:
roster upgrade, or the same from the portal. See upgrading. - The whole portal, screen by screen: the portal.